
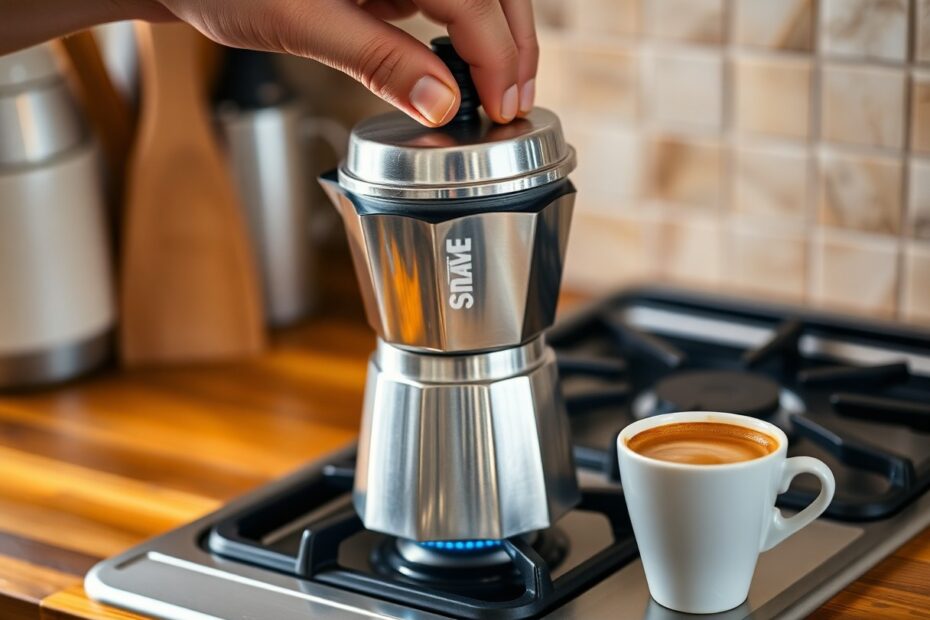
Moka pots deliver rich, concentrated coffee with ease when used correctly. You’ll fill the base with water, add ground coffee to the filter, and assemble the pot before placing it on your stove. Control the heat to avoid bitterness, and remove it just as the brew finishes. This simple method gives you bold coffee every time.
Anatomy and Functional Components
Every moka pot relies on a simple yet precise design to deliver rich, concentrated coffee. You’ll notice it’s made up of three main chambers stacked vertically, each playing a distinct role in the brewing process. The bottom chamber holds water, the middle one accepts ground coffee, and the top collects the finished brew. These parts screw together tightly, forming a sealed system that uses steam pressure to push water through the grounds.
Material matters when it comes to performance and heat distribution. Most moka pots are crafted from aluminum or stainless steel, each affecting how evenly the pot heats on your stovetop. Aluminum heats quickly but may wear over time, while stainless steel offers durability and better heat retention. Regardless of material, the fit between chambers must be snug to maintain proper pressure during brewing.
Small details like the gasket and filter plate contribute significantly to consistent results. The rubber gasket, located between the top and middle sections, ensures a tight seal that prevents steam from escaping prematurely. Over time, this piece can degrade, so checking and replacing it keeps your brew strong and clean. Understanding these components helps you maintain your moka pot for years of reliable use.
Understanding the Three-Chamber Design
Water fills the lower chamber up to the safety valve, providing the base for steam pressure to build as it heats. This chamber never comes into direct contact with the final coffee, but its role is foundational. As the stove heats the pot, water begins to boil, creating steam that increases internal pressure.
The middle section, known as the filter basket, holds finely ground coffee without tamping it down. You simply fill it level with grounds, avoiding overpacking, which can restrict water flow. Positioned between the water chamber and the upper collector, this basket allows pressurized water to pass through the coffee, extracting flavor on its way up.
Steam and hot water are forced through the coffee grounds and into the upper chamber, where your brewed coffee collects. This top portion has a hollow stem that guides the brewed coffee upward, preventing it from dripping back down. Once the lower chamber empties, you’ll hear a gurgling sound-your signal that brewing is complete.
The Role of the Safety Valve and Internal Filter
Pressure builds quickly inside the lower chamber, and the safety valve prevents dangerous over-pressurization. Located inside the base, this small metal plug releases excess steam if pressure exceeds safe levels. It’s a passive but vital feature that protects both the pot and the user during every brew cycle.
The internal filter, usually a perforated metal disk, sits at the bottom of the filter basket. It keeps coffee grounds out of the upper chamber while allowing water to flow evenly through the bed. Over time, oils and residue can clog the tiny holes, so rinsing it after each use maintains optimal performance.
You should never ignore signs of wear on either component. A clogged safety valve or warped filter can lead to uneven extraction or, worse, pressure issues. Regular inspection ensures your moka pot functions safely and consistently, delivering the bold coffee you expect.
One often-overlooked detail is how the safety valve doubles as a maintenance checkpoint. If you notice water leaking from the base during brewing, the valve may need cleaning or replacement. Likewise, the internal filter’s alignment matters-misplacing it can cause channeling, where water bypasses the coffee grounds, resulting in weak or bitter coffee. Keeping both components in top condition is key to a balanced, flavorful brew every time.
Essential Factors for Coffee Quality
Coffee quality begins with the beans you choose. Freshly roasted, whole beans preserve aromatic compounds that degrade quickly after grinding. Always opt for beans roasted within the past two to three weeks and grind them just before brewing. The roast profile also matters-medium to dark roasts typically perform best in a Moka pot, balancing richness without excessive bitterness.
Grind consistency directly impacts extraction. Too fine, and water struggles to pass through, causing over-extraction and bitterness. Too coarse, and water rushes through, yielding weak, sour coffee. A uniform medium-fine grind, similar to table salt, ensures even saturation and optimal pressure buildup. Your grinder’s quality plays a role-blade grinders often produce uneven particles, while burr grinders deliver precision.
Water choice and temperature shape the final cup as much as the beans. Tap water with high chlorine or mineral content can distort flavor. Use filtered water for a clean, balanced result. The water should be hot but not boiling when poured into the base-around 160°F to 185°F works best. Thou
- Select freshly roasted, whole beans
- Use a burr grinder for consistent particle size
- Brew with filtered water at optimal temperature
Selecting the Ideal Grind Size for Stovetop Brewing
Grind size determines how water interacts with coffee grounds during stovetop brewing. A Moka pot relies on steam pressure to push water through the coffee puck, so the resistance must be just right. Too fine a grind increases resistance excessively, leading to clogging and burnt flavors. You want particles that allow steady flow without stalling the brewing process.
Your coffee should resemble granulated sugar, not powdered sugar or sea salt. This medium-fine consistency offers enough surface area for extraction while maintaining permeability. If your brew tastes harsh or spills over violently, the grind is likely too fine. On the other hand, a weak, watery result suggests it’s too coarse. Adjust incrementally until the stream flows steadily in a thin, honey-like ribbon.
Different beans and roasts may require slight grind adjustments. Denser beans, like high-altitude Arabicas, might need a slightly finer setting. Darker roasts, being more brittle, can extract faster and may benefit from a touch coarser grind. Always test one variable at a time and let taste guide your refinement. Thou
Water Quality and Temperature Considerations
Water isn’t just a carrier-it’s half the beverage. Minerals like calcium and magnesium enhance flavor extraction, but too much leads to scale buildup and bitter notes. Chlorine and other impurities in tap water mute delicate aromas. Filtered water strikes the right balance, offering clean taste without stripping crucial minerals.
Temperature control starts before the stove. Pouring boiling water into the Moka pot’s base can scorch the coffee before brewing completes. Instead, use hot water from a kettle heated to about 185°F. This allows a gradual, even rise in temperature, promoting balanced extraction. On the stove, medium heat prevents sudden pressure spikes that disrupt the flow.
Consistency in water and heat leads to repeatable results. Let the Moka pot do its work without rushing-listen for the gurgle that signals the end of extraction. Remove it from heat immediately to avoid overheating. The table below outlines key water and temperature factors:
Water and Temperature Guidelines
| Water Type | Filtered, low-chlorine |
| Starting Water Temp | 160°F-185°F |
| Stove Heat Level | Medium |
| Mineral Content | Moderate (50-150 ppm) |
Using the right water ensures clarity and depth in every cup. Cold tap water introduces temperature shock and inconsistent extraction, while boiling water risks bitterness. Preheating water gives you control over the initial thermal environment, letting the Moka pot build pressure smoothly. The table above summarizes the ideal conditions for optimal brewing. Thou
Expert Tips for Flavor Enhancement
Perfecting your moka pot brew goes beyond just following steps-it’s about refining small details that shape the final cup. Using freshly ground coffee is the foundation of rich flavor, so grind just before brewing to preserve aromatic oils. The coarseness should resemble table salt, allowing balanced extraction without over-pulling bitter compounds. Water quality matters just as much; filtered water prevents off-flavors from chlorine or minerals.
- Pre-warm your moka pot with hot water to stabilize brewing temperature
- Tap the filter gently to settle grounds without tamping
- Remove the pot from heat the moment you hear the gurgling slow
- Give the base a quick rinse with cold water to halt extraction instantly
Perceiving subtle flavor shifts comes with practice and attention to timing, heat, and grind.
Using Pre-Heated Water to Prevent Bitterness
Starting with hot water in the base chamber reduces the time your moka pot spends heating, which helps avoid over-extraction. When cold water slowly heats, the initial low pressure can cause uneven saturation and premature dripping, leading to harsh notes. By using water just off the boil, you reach optimal pressure faster, promoting a cleaner, more consistent draw through the coffee bed.
Temperature stability plays a big role in flavor clarity. Cold water forces the stove to work longer, increasing the chance of overheating the lower chamber and scalding the coffee. Pre-heated water maintains momentum in the brewing phase, so the coffee spends less time exposed to rising heat before full pressure builds. This shortens the overall cycle and protects delicate flavor compounds.
You’ll notice sweeter, more balanced results when the transition from heat application to full extraction is swift. Perceiving the difference starts with comparing side-by-side brews-one with cold water, one with hot. The contrast in bitterness and body becomes clear quickly.
Managing the Flow Rate and Extraction Timing
Flow rate directly impacts how your coffee tastes, and controlling it begins with heat level. A medium-low flame gives steady pressure buildup, allowing coffee to rise smoothly without sputtering. Too high a flame causes rapid steam expansion, forcing water through too fast and extracting unevenly. The ideal stream is a steady, honey-like flow, not a violent spurt.
Timing the extraction ensures you capture the sweetest part of the brew. The first dark coffee to emerge carries the most desirable oils and aromas. Once the stream turns pale or starts to hiss and gurgle, the useful extraction is over. Letting it continue pulls water through dry grounds, adding thin, bitter notes to your cup.
Removing the pot from heat at the right moment is just as important as the grind or water temperature. Perceiving the shift in sound and color helps you cut the brew at its peak.
Mastering flow rate means watching both sight and sound-when the coffee slows to a trickle and the noise drops to a soft sputter, the process is complete. Letting it go further doesn’t yield more coffee; it degrades what you already have. Consistent practice trains your ear and eye to recognize the ideal endpoint, turning each brew into a repeatable ritual of precision and flavor.
Maintenance and Longevity Practices
Caring for your Moka pot properly ensures it delivers rich, consistent coffee for years. Regular attention to cleaning and component wear keeps performance at its peak while preserving the integrity of the metal and seals. You’ll notice better-tasting brews when residue and oils don’t build up over time.
Using the right techniques during and after each brew cycle contributes significantly to the pot’s lifespan. Always allow the Moka pot to cool before handling, and never force disassembly while parts are hot. This prevents warping and maintains the precise fit between chambers.
Storing your Moka pot correctly also plays a role in its durability. Keep it in a dry place, preferably disassembled, so moisture doesn’t linger in the gasket or filter. Over time, these small habits add up, protecting both flavor and function.
Proper Cleaning Techniques Without Detergents
Washing your Moka pot with soap can leave behind residues that affect the taste of your coffee. Instead, rinse each piece with warm water immediately after use to remove coffee grounds and oils. This simple step prevents buildup without introducing foreign flavors.
For deeper cleaning, use a soft brush or cloth to scrub the filter and funnel. You can also run the pot with water only-no coffee-to flush out any lingering particles. This method clears internal channels without risking chemical contamination.
Drying each component thoroughly before reassembly stops mineral deposits and corrosion. Let the parts air dry upside down on a clean towel, ensuring no moisture stays trapped. Over time, this routine keeps your Moka pot tasting fresh and functioning smoothly.
Identifying When to Replace Gaskets and Seals
You’ll start noticing weak or inconsistent brews when the rubber gasket loses its elasticity. Steam escapes through gaps, reducing pressure and leading to under-extracted, watery coffee. This is often the first sign the seal needs attention.
Inspect the gasket regularly for cracks, brittleness, or warping. If it no longer sits flush between chambers or feels stiff to the touch, it’s time for a replacement. A good seal is imperative for building the pressure needed for proper extraction.
Most manufacturers recommend replacing the gasket every 6 to 12 months, depending on use. Even if it looks intact, aging rubber degrades performance. Fresh seals restore your Moka pot’s efficiency and maintain the quality of every brew.
Replacing the gasket is a simple, low-cost task that makes a noticeable difference in your coffee. Most Moka pots use standard-sized gaskets, available from the manufacturer or kitchen specialty stores. Always keep a spare on hand to avoid brewing interruptions.
Troubleshooting Common Performance Issues
Steam escaping from the sides of your Moka pot instead of flowing into the upper chamber often points to a compromised seal. Check the rubber gasket located under the filter plate; over time, it can dry out, crack, or become misshapen. If the gasket isn’t forming a tight seal, steam will leak prematurely, reducing pressure and weakening extraction. Replacing the gasket every six to twelve months ensures consistent performance and prevents messy sputtering during brewing.
Another frequent culprit behind erratic brewing is excessive heat. The Moka pot relies on steady, moderate pressure to draw water through the coffee grounds. If your stove burner is too large or set too high, the base heats unevenly, causing sudden bursts of steam and sputtering. Always use a burner that matches the pot’s base size and keep the flame at medium-low once steam begins to rise.
Overfilling the water chamber or using too fine a grind can also lead to blockages and pressure imbalances. Water should stay below the safety valve, and coffee should be medium-fine-similar to table salt. Too much resistance from finely ground or over-tamped coffee restricts flow, leading to gurgling or weak output. Adjusting these variables restores smooth, steady brewing.
Resolving Steam Leaks and Sputtering
Steam leaking from the joint between the base and funnel section usually means the gasket isn’t sealing properly. Inspect it for wear, debris, or misalignment before each use. A quick rinse and proper seating of the filter plate can often prevent leaks, but if the rubber feels brittle or flattened, replace it immediately to maintain pressure integrity.
Sputtering at the end of the brew cycle is normal, but violent spitting or hissing suggests overheating. Once you hear gurgling, remove the pot from the heat right away. Leaving it on too long burns the coffee and strains the seal, increasing the chance of leaks in future uses. Timing your brew helps avoid this.
Ensure the top and bottom chambers are screwed together tightly-but not forced. Overtightening can warp the gasket or misalign the parts, creating gaps. Hand-tighten until snug, then let the brewing process do the work. A secure, even connection keeps steam moving upward through the coffee, not escaping at the seams.
Adjusting Variables for Weak or Over-Extracted Brews
Weak coffee often results from too coarse a grind or insufficient coffee dose. If your brew lacks body and tastes thin, try a slightly finer grind or add an extra half-scoop of coffee to the basket. Avoid packing it down-just level it off. This increases resistance and improves extraction without clogging the filter.
Bitter, ashy flavors usually mean over-extraction, commonly caused by too fine a grind or excessive heat. Lower the burner setting and monitor the brew time; ideal extraction finishes just as the gurgling starts. A smoother, balanced cup emerges when heat and grind size are in harmony.
Water temperature also plays a role. Starting with cold water slows the process, while preheated water speeds it up. For more control, heat your water to about 160°F (70°C) before filling the chamber. This reduces total brew time and minimizes the risk of scorching the grounds.
Consistency in your brew depends on repeatable variables. Once you identify the right grind size, dose, and heat level for your taste, document them. Small changes in any one factor can shift the balance, so keeping notes helps you replicate success and fine-tune future batches with confidence.
To wrap up
Upon reflecting on the process of brewing with a Moka pot, you now hold the knowledge to consistently produce rich, espresso-like coffee at home. This stovetop method relies on steam pressure to push hot water through finely ground coffee, delivering a bold flavor profile that rivals more complex machines. Your attention to grind size, water level, and heat control directly influences the quality of each brew.
You’ve learned how to assemble the pot correctly, avoid overfilling the filter basket, and recognize the telltale gurgle that signals brewing completion. Using medium heat prevents scalding the coffee and preserves its aromatic depth. Cleaning and drying the parts after each use ensure longevity and prevent stale tastes from building up over time.
With practice, your timing and technique will sharpen, turning each morning ritual into a reliable, satisfying experience. The Moka pot rewards patience and consistency, offering a simple yet effective path to strong, flavorful coffee without the need for expensive equipment. You’re fully equipped to make it a staple in your kitchen.