
Essential Factors for High-Quality Espresso
Every great espresso starts with attention to detail, even when you’re not using a machine. The foundation lies in choosing the right beans, grinding them properly, and using clean, balanced water. Without pressure from an espresso machine, these elements become even more influential in extracting rich flavor and a velvety crema.
You’ll need a fine, consistent grind that mimics what traditional machines require. Too coarse, and your brew will be weak; too fine, and it may clog or over-extract. Pair this with water heated just below boiling-around 195°F to 205°F-for optimal extraction without bitterness.
- Use freshly roasted coffee beans for peak flavor
- Grind immediately before brewing to preserve aroma
- Maintain precise water temperature during infusion
- Ensure even water distribution over the grounds
This builds the foundation for espresso-like intensity and balance, no machine required.
Selecting the Optimal Roast Profile
Dark roasts are traditionally favored for espresso because they produce bold, syrupy bodies and low acidity-qualities that mimic machine-extracted shots. The extended roasting breaks down sugars and oils, enhancing richness and aiding crema formation, even without high pressure.
You might be tempted to use a light roast for its bright notes, but these often lack the body needed for authentic espresso character. Medium-dark roasts strike a balance, offering complexity while still delivering the depth and smooth finish you want.
Always check roast dates and aim for beans within 2-4 weeks post-roast. Stale coffee loses volatile compounds, muting flavor and reducing extraction efficiency. This ensures your homemade espresso remains full-bodied and aromatic.
The Role of Grind Consistency and Size
A fine, uniform grind is non-negotiable when replicating espresso without a machine. Inconsistent particles lead to uneven extraction-some over-brewed and bitter, others underdeveloped and sour. Your goal is a texture similar to powdered sugar, with no coarse fragments.
Burr grinders outperform blade models by producing even granules, vital for balanced flavor. Blade grinders create a mix of dust and chunks, disrupting water flow and extraction. Without consistent pressure, this inconsistency becomes even more pronounced.
Adjust your grind based on your method-AeroPress, Moka pot, or manual pressurized devices-each demands slight variations. This ensures optimal resistance and contact time for concentrated, espresso-like results.
Grind size directly affects how water interacts with coffee. Too fine, and water struggles to pass through, causing over-extraction. Too coarse, and it rushes through, yielding weak, watery coffee. Consistency ensures every particle contributes equally to flavor, creating a harmonious, full-bodied shot. For non-machine methods, this precision compensates for the lack of 9-bar pressure, bringing you closer to true espresso quality.
Optimizing Water Quality and Temperature
Water makes up over 90% of your brew, so its quality shapes the final taste. Hard water with high mineral content can lead to over-extraction and scale buildup, while overly soft water produces flat, lifeless coffee. Aim for balanced, filtered water to let the coffee’s true character shine.
Temperature control is just as critical. Water that’s too hot scorches the grounds, creating bitterness. If it’s too cool, it fails to extract vital oils and sugars. Staying within the 195°F to 205°F range ensures a clean, balanced shot with depth and sweetness.
This table outlines key water variables and their ideal ranges:
| Factor | Optimal Range |
|---|---|
| Temperature | 195°F – 205°F |
| Total Dissolved Solids (TDS) | 75-250 ppm |
| pH Level | 6.5-7.5 |
| Calcium Hardness | 1-5 grains per gallon |
This precision ensures clarity, sweetness, and a clean finish in every cup.
Water isn’t just a carrier-it actively dissolves flavor compounds from the coffee. Using filtered tap water with balanced
How-To: Mastering the Moka Pot
Perfecting your espresso-like brew with a Moka pot begins with understanding its simple yet precise mechanics. This stovetop brewer uses steam pressure to push hot water through finely ground coffee, delivering a rich, concentrated cup that closely mimics true espresso. Your success hinges on technique, not complexity-once you grasp the rhythm of heat and timing, consistent results follow.
Many beginners overlook the importance of grind size and distribution. Aim for a fine grind, slightly coarser than what you’d use for a traditional espresso machine. Too fine, and the water struggles to pass through; too coarse, and the brew becomes weak and under-extracted. Always fill the filter basket evenly without tamping-let gravity do the work.
Patience separates a good brew from a burnt one. As the Moka pot heats, listen closely. When you hear a gurgling sound, remove it from the heat immediately. That sound means most of the water has passed through, and lingering too long introduces bitter, scorched notes. Serve right away for the fullest flavor.
Proper Loading and Assembly Techniques
Start by filling the bottom chamber with hot water just below the safety valve. Cold water slows extraction and can affect flavor balance, so preheating helps maintain consistent pressure. Never let the water touch the valve-this prevents pressure issues and potential overflow during brewing.
Next, add freshly ground coffee to the filter basket. Use a level scoop and gently shake the pot to settle the grounds evenly. Do not tamp or press down-overpacking restricts water flow and increases the risk of overpressure or bitter results. The goal is uniform distribution, not compression.
Screw the top and bottom chambers together firmly by hand. Avoid using excessive force, which can damage the seal or make disassembly difficult later. A secure but gentle twist ensures a tight fit without risking warping. Now you’re ready to heat-position the pot on your burner, ready for extraction.
Managing Heat to Prevent Scorching
Heat control is where most Moka pot users go wrong. Always start with medium-low heat-especially if using gas or induction. High temperatures cause water to rush through too quickly, extracting harsh, bitter compounds and potentially burning the coffee at the base.
Watch the brew closely as steam rises through the central column. A steady, gradual flow indicates proper heat management. If you see steam escaping from the sides or hear loud hissing, the heat is too high. Adjust the burner immediately to avoid ruining the batch.
Remove the pot from heat the moment you hear gurgling or see dark drips slowing. That sound signals the chamber is nearly empty, and continued heating will scorch the remaining coffee. Cool the base briefly under running water to halt extraction instantly if needed.
Using a flame tamer or diffuser can greatly improve heat distribution, especially on powerful burners. This simple tool prevents hot spots and ensures even, gentle brewing-critical for preserving the coffee’s nuanced flavors without tipping into bitterness.
How-To: The French Press Concentration Method
Creating espresso-like coffee with a French press relies on adjusting your approach to maximize strength and body. Start by grinding your beans to a fine consistency, slightly finer than what you’d use for regular French press but not as fine as traditional espresso. This helps extract more flavor without over-clogging the mesh filter. Use a ratio of 1:2 or even 1:1.5 (coffee to water) for a concentrated brew that mimics the intensity of espresso.
You’ll need to shorten the steep time to avoid over-extraction. Instead of the usual four minutes, aim for 60 to 90 seconds. Pour hot water-just off the boil-over the grounds, stir gently, and place the lid on with the plunger up. When time’s up, press slowly and pour immediately. This quick extraction preserves clarity while delivering a bold, syrupy mouthfeel.
For best results, preheat your French press and serve the concentrate straight or with a splash of hot water to adjust strength. While it won’t produce true espresso pressure, this method yields a rich, full-bodied coffee that works beautifully in lattes or on its own.
Ratios for Maximum Coffee Strength
Getting the ratio right is the key to achieving espresso-level intensity without a machine. A standard French press uses 1:15, but for concentration, drop to 1:2-two grams of water for every gram of coffee. This ultra-strong ratio produces a thick, potent brew that stands up to milk just like espresso. It may sound extreme, but it’s necessary to replicate that dense coffee base.
You’ll need to experiment within this range depending on your beans and taste. Lighter roasts often handle higher concentrations better due to their inherent brightness and acidity. Darker roasts can become overly bitter if pushed too far, so consider a 1:2.5 ratio as a starting point. Always weigh your coffee and water for consistency-eyeballing won’t deliver repeatable results.
Keep in mind that this concentrate is not meant to be sipped like regular coffee. It’s designed to be diluted slightly or used as a base for milk drinks. Think of it like cold brew concentrate, but made hot and fast. With the right ratio, you’re already halfway to a satisfying espresso substitute.
Techniques for Emulating Crema and Body
True crema comes from high-pressure extraction, but you can mimic its texture with a few smart tricks. After brewing your French press concentrate, pour it into a small French whip or use a handheld milk frother directly in the cup. A quick 15-20 second burst introduces tiny bubbles that resemble crema’s golden layer. This foam won’t last long, but it adds visual appeal and a silky mouthfeel.
Body is easier to achieve through grind and brew control. A fine grind and short steep extract oils and solids that give weight to the cup. Avoid plunging too fast-doing so stirs up fine sediment that can make the coffee harsh. Instead, press slowly and pour immediately to capture the richest part of the brew.
Another trick is to add a tiny pinch of salt to the grounds before brewing. It won’t make the coffee salty, but it can smooth bitterness and enhance perceived richness. Combined with frothing, this creates a more espresso-like experience in both texture and taste.
While no method perfectly duplicates crema, these techniques come surprisingly close in both appearance and sensation. The froth from a milk frother doesn’t have the emulsified oils of real crema, but it delivers a similar mouth-coating quality. For those missing the luxurious top layer of a well-pulled shot, this small step makes a noticeable difference. Body, on the other hand, is largely within your control through brewing variables. By focusing on extraction and texture, you create a beverage that feels substantial and satisfying-just like espresso should.
How-To: Utilizing the AeroPress
Creating espresso-style coffee with the AeroPress relies on generating pressure manually to mimic machine extraction. You’ll need finely ground coffee-slightly finer than drip but not as fine as traditional espresso-and hot water just off the boil, around 200°F. Start by assembling your AeroPress on top of a sturdy mug or carafe, placing a filter in the cap and rinsing it with hot water to eliminate paper taste.
Begin your brew by adding 14-18 grams of coffee and pouring in 60-80 ml of water to start the steep. Stir gently for even saturation, then let it brew for 30 to 60 seconds. After steeping, slowly press down on the plunger with steady, firm pressure over 20-30 seconds. This manual compression forces water through the grounds and filter, producing a concentrated, rich shot.
The resulting brew is smooth, low in acidity, and intensely flavorful-closer to a ristretto than a standard espresso. While not identical to machine-pulled shots, it delivers a satisfying intensity suitable for lattes or straight sipping. Clean-up is quick, and the entire process takes under two minutes once you’re practiced.
Creating High Pressure Manually
Generating sufficient pressure with the AeroPress depends on your pressing technique and grind size. Too coarse a grind leads to weak extraction, while too fine can make plunging difficult or over-extract. Aim for a texture resembling powdered sugar to ensure optimal resistance during compression.
Your hand strength and pressing speed directly affect the final concentration. Push too fast and you risk channeling or bitterness; too slow and the shot may under-extract. Practice consistent downward force, letting the seal build gradually to replicate the 9-12 bars of pressure found in commercial machines.
Some users modify their method by inverting the AeroPress, allowing longer steep times before pressing. This technique gives more control over extraction and reduces the chance of dripping during brewing. With attention to detail, you can achieve a surprisingly dense, syrupy output that mirrors espresso’s body.
Best Practices for Espresso-Style Extraction
Using freshly roasted beans ground immediately before brewing ensures the most vibrant flavor and aromatic intensity. Stale or pre-ground coffee loses volatile compounds quickly, resulting in a flat, lifeless shot. Aim to grind within moments of brewing for the best results.
Water temperature plays a major role in extraction balance. Water that’s too hot scorches the grounds, creating harshness, while cooler water under-extracts, leaving sour notes. Target 195-205°F for a clean, balanced profile that highlights sweetness and depth without bitterness.
Consistency in dose, grind, and timing builds reliability in your method. Track your variables-coffee weight, water volume, brew time-and adjust one at a time to fine-tune your ideal shot. Over time, this attention sharpens your ability to replicate quality brews on demand.
For even better results, consider using a paper-metal hybrid filter or a fine stainless steel option. These can enhance body and richness, bringing your AeroPress shot even closer to traditional espresso in mouthfeel and intensity.
How-To: Leveraging Portable Espresso Makers
Portable espresso makers have transformed how you enjoy rich, concentrated coffee on the go. These compact devices rely on manual force to generate the pressure needed for proper extraction, mimicking the function of traditional machines. You can find them in various designs, from handheld plungers to compact cylinder systems, all built for convenience without sacrificing quality.
Most models operate by forcing hot water through finely ground coffee at high pressure. You control the strength and volume by adjusting grind size, water temperature, and pump intensity. With a little practice, you’ll pull shots that rival those from electric machines, even while hiking or traveling.
They’re lightweight, easy to clean, and don’t require electricity, making them ideal for outdoor adventures or small kitchens. Once you master the rhythm of pumping and timing, your morning espresso becomes a portable ritual you can take anywhere.
Generating Pressure Through Manual Pumping
Manual pumping is the core mechanism that allows portable devices to produce real espresso. You build pressure by operating a hand-driven plunger or lever, typically reaching 9 to 15 bars-the range needed for proper extraction. This hands-on method gives you direct control over the brewing process, letting you fine-tune each shot.
Start by preheating the chamber and loading finely ground coffee evenly into the filter basket. After securing the top, pump the handle steadily until you feel resistance, then continue with consistent strokes. The key is maintaining steady pressure without over-pumping, which can lead to bitterness.
Some models use spring-assisted systems to reduce effort, while others rely purely on arm strength. With practice, you’ll develop a feel for the ideal number of pumps and timing, ensuring a smooth, rich shot every time.
Maintenance for Consistent Results
Clean equipment ensures every shot tastes fresh and performs reliably. After each use, disassemble your portable maker and rinse all parts thoroughly to remove coffee oils and residue. Leftover buildup can clog small channels and affect pressure, leading to weak or uneven extraction.
Dry each component completely before reassembling to prevent mold or corrosion, especially in humid environments. Pay close attention to seals and gaskets, as these wear over time and can leak if damaged or dirty.
Periodically check for wear on moving parts and replace worn pieces promptly. A well-maintained device delivers consistent pressure and flavor, shot after shot, whether you’re at home or off the grid.
Regular maintenance isn’t just about cleanliness-it directly impacts performance. Worn seals or clogged filters disrupt pressure balance, which alters extraction and ruins the espresso’s texture. By caring for your device, you protect both taste and function over the long term.
Expert Tips for Perfecting Your Brew
Consistency in your brewing process leads to better control over flavor. Use the same grind size, water temperature, and brew time each time to identify what works best. Small changes can have big impacts, so keep notes to track your progress.
Always use freshly roasted beans and grind them just before brewing. Stale coffee dulls the taste, no matter how precise your method. A burr grinder gives you the most uniform particles, which improves extraction.
- Pre-wet your filter to eliminate paper taste and stabilize temperature
- Use a gooseneck kettle for precise water control
- Stir the slurry gently halfway through brewing to promote even saturation
Thou can refine your technique with attention to detail and repetition.
Pre-Heating Equipment for Thermal Stability
Heat loss during brewing cools the water too quickly, leading to under-extraction. Pour hot water into your brewing vessel and let it sit for 30 seconds before starting. This simple act maintains a stable thermal environment.
Your brewing device-whether a mason jar, French press, or DIY setup-absorbs heat if not pre-warmed. Cold glass or metal pulls energy from the water, disrupting the ideal 195-205°F range needed for proper espresso-like strength.
Even your cup matters. Pre-heating your serving vessel prevents immediate cooling the moment the brew lands. Thermal stability from start to finish ensures a richer, more balanced shot.
Troubleshooting Common Flavor Imbalances
Bitterness often comes from over-extraction or water that’s too hot. If your brew tastes burnt or harsh, try a slightly coarser grind or let the water cool 10-15 seconds before pouring. Timing also plays a role-too long a brew increases bitterness.
Sourness usually signals under-extraction. The water passed through too quickly, failing to pull out enough flavor. Adjust by using a finer grind, increasing brew time, or ensuring your water is hot enough-just below boiling.
Weak or watery results suggest insufficient coffee or poor contact time. Use a 1:2 ratio of coffee to water and stir gently to improve extraction. Check that your grind matches the method-too coarse for a DIY espresso setup won’t deliver strength.
Understanding these imbalances gives you control. Each adjustment fine-tunes your sensory experience, turning trial and error into mastery. Pay attention to taste, not just technique, and let your palate guide improvements.
To wrap up
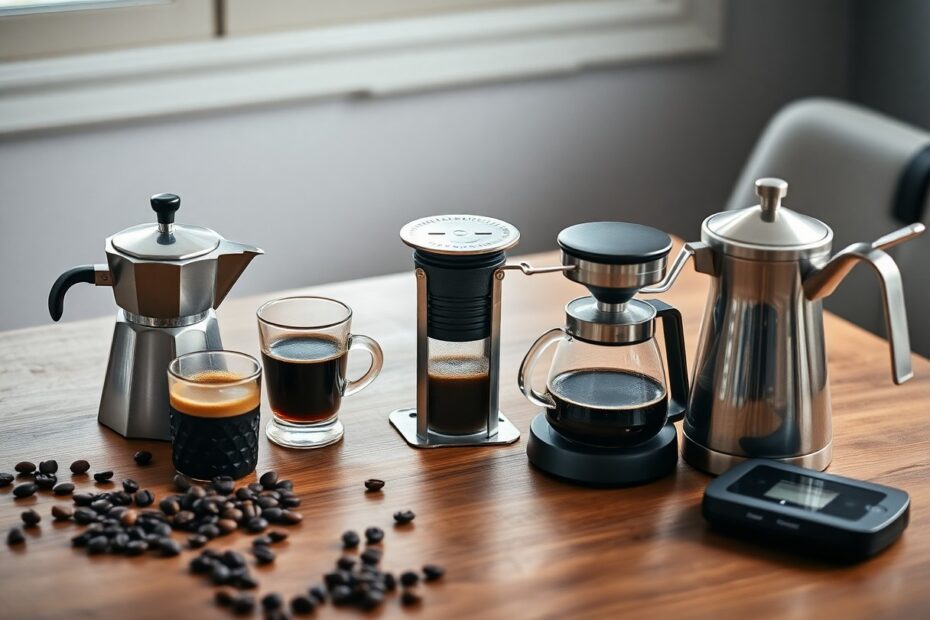
Following this guide, you now hold the knowledge to make espresso without a machine using four accessible methods: the Moka pot, AeroPress, French press, and stovetop percolator. Each method delivers a concentrated, bold coffee resembling true espresso, tailored to your tools and taste. The Moka pot produces a rich, intense brew with minimal effort, while the AeroPress offers precision and speed for those who value control. The French press method yields a full-bodied result, though slightly less concentrated, and the stovetop percolator brings a rustic strength that satisfies deep coffee cravings.
You don’t need expensive equipment to enjoy espresso-style coffee at home. These techniques rely on pressure, heat, and fine grounds to extract flavor efficiently. With practice, you can adjust grind size, water temperature, and brew time to match your preference. Your morning ritual becomes simpler, more personal, and entirely within your control.
Every method proves that great coffee starts with attention to detail, not machinery. You already have what it takes to brew something strong, satisfying, and authentically yours.