
Just grab coarsely ground coffee and cold water to start. Steep them overnight, then strain for a smooth, low-acid coffee concentrate. You control the strength and flavor, and cleanup is simple. This method saves money and beats store-bought versions every time.
Selecting High-Quality Ingredients
Your cold brew’s flavor begins long before it hits the pitcher-it starts with what you pour into the grinder. Quality beans make a noticeable difference, especially in a slow-steeped method where subtleties have time to emerge. You’re not masking flavors with heat or pressure, so every note, from chocolatey depth to bright citrus hints, comes through clearly. Choose beans from reputable roasters who list origin, roast date, and tasting notes.
Water plays a bigger role than many realize. Since cold brew is mostly water, impurities or strong mineral profiles can distort the coffee’s natural character. Use filtered water to ensure a clean, balanced extraction. Avoid distilled water, as it lacks minerals needed to pull out desirable flavors. Think of water as a silent partner in the process-neutral, but vital for harmony.
Simplicity is your ally here. With only two ingredients, each must carry its weight. There’s no room for stale beans or chlorinated tap water. Treat every element with care, because what you start with is exactly what you’ll taste in the final glass-smooth, rich, and true to the bean.
Choosing the Right Roast Profile
Different roast levels shape your cold brew in distinct ways. Dark roasts bring bold, smoky, and sometimes syrupy notes that stand up well to long steeping. Their lower acidity makes them a favorite for those who prefer a mellow, approachable cup. If you enjoy cold brew with milk or sweetener, a dark or medium-dark roast often blends seamlessly.
Medium roasts offer a balanced middle ground, preserving some of the bean’s original character while still developing rich body. You might notice hints of caramel, nuts, or stone fruit, depending on the origin. These roasts shine when you want complexity without bitterness, especially in black cold brew served over ice.
Light roasts are less common but worth exploring. Their brighter, floral, or tea-like qualities can produce a surprisingly nuanced cold brew, though they require careful steeping to avoid under-extraction. If you appreciate tasting terroir and varietal differences, a high-quality light roast may surprise you with its clarity and depth.
Importance of Freshly Coarse-Ground Beans
Freshly ground beans unlock the full potential of your cold brew. Pre-ground coffee loses aromatic compounds quickly, leaving your batch tasting flat. Grinding just before steeping ensures maximum flavor transfer during the 12-24 hour soak. The oils, sugars, and acids that define great coffee are preserved only when grinding is the final step.
A coarse grind is non-negotiable for cold brew. Fine particles over-extract, creating bitterness and sludge, while too coarse a grind leads to weak, watery results. Aim for a consistency similar to rough sea salt-uniform and open. This allows water to move slowly through the grounds, extracting sweetness and body without harshness.
Your grinder matters as much as the beans. Blade grinders create uneven particles, which leads to inconsistent extraction. A burr grinder delivers precision, ensuring every piece of coffee steeps at the same rate. This control is what separates a good cold brew from a great one.
Grinding your beans right before steeping isn’t just a suggestion-it’s the foundation of flavor clarity. When coffee is exposed to air, it begins to oxidize, dulling the vibrant notes you’re trying to capture. A coarse, fresh grind maximizes surface area for extraction while minimizing bitterness, giving you a smoother, more aromatic concentrate. This small step makes a lasting impact on every sip.
Necessary Equipment and Preparation
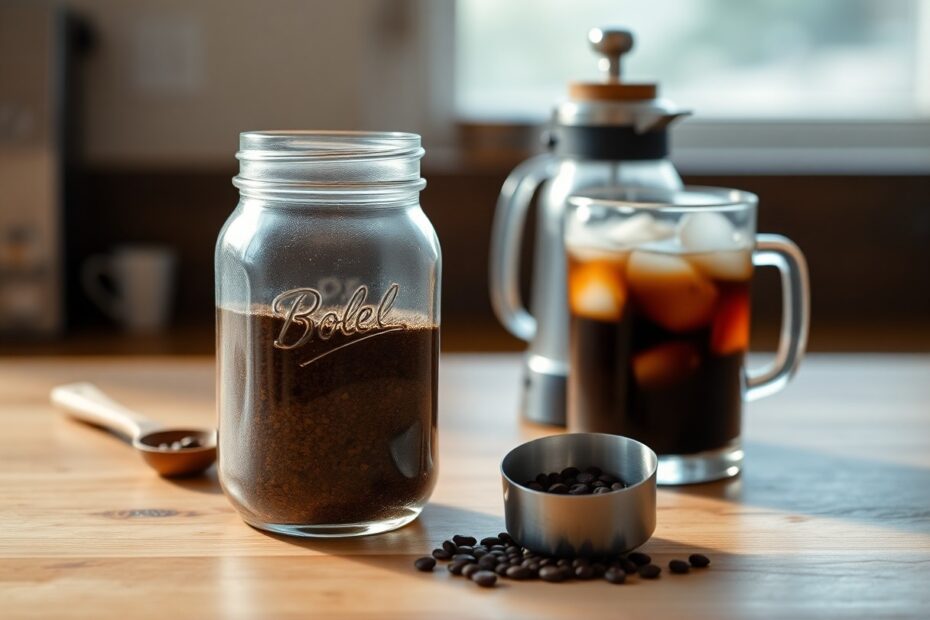
Every successful cold brew starts with the right setup. You don’t need a professional barista kit, but having a few key tools ensures consistency and quality. A large container for steeping, a reliable filtration method, and coarse-ground coffee are the foundation of a smooth, rich concentrate.
Start by gathering everything before beginning. This prevents mid-process interruptions and keeps your workflow smooth. Use filtered water if possible-its purity enhances flavor, especially since cold brew uses more coffee per cup than other methods.
Preparation also means planning ahead. Cold brew needs 12 to 24 hours to steep, so timing matters. Set your brew the night before or early in the morning, depending on when you want your first glass. Patience here pays off in flavor.
Selecting a Brewing Vessel
Your brewing vessel sets the stage for extraction. Choose a container large enough to hold your coffee and water ratio comfortably, with room to stir. Glass jars, food-grade plastic buckets, or ceramic crocks all work, but glass allows you to monitor the steeping process visually.
Look for a vessel with a wide mouth. It makes adding coffee and stirring easier, plus simplifies cleaning afterward. A lid is vital to keep dust and odors out while your brew chills in the fridge or sits at room temperature.
Consider durability and seal quality. A well-sealed jar prevents leaks and preserves freshness. Some people use large mason jars, while others prefer dedicated cold brew makers with built-in filters. Pick one that fits your routine and storage space.
Filtration Tools for a Clean Finish
Filtration determines how clean and smooth your final brew tastes. Sediment and fine coffee particles can cloud your concentrate, so removing them is vital. A coarse filter catches larger grounds, while a finer one handles the silt.
A double-filter approach works best. Begin with a metal or nylon mesh sieve to remove the bulk, then follow with a paper coffee filter or a fine-mesh cloth like cheesecloth. This two-step method ensures clarity without sacrificing body.
Reusable filters save money and reduce waste over time. A French press with its built-in plunger can act as both brewer and filter, though it may let some fines through. For precision, a pour-over setup with a paper filter delivers the cleanest result.
Using the right filtration tools doesn’t just improve texture-it enhances shelf life. A sediment-free brew stays fresher longer in the fridge, often up to two weeks. Less debris means fewer off-flavors developing over time, so your cold brew remains smooth from first pour to last.
Step-by-Step Brewing Instructions
| What You’ll Need | Cold brew requires coarse coffee grounds, cold or room-temperature water, a large jar or pitcher, a fine-mesh sieve or cheesecloth, and optionally a French press or dedicated cold brew maker. |
| Brewing Ratio | Use a 1:4 coffee-to-water ratio by weight-1 cup of coarsely ground coffee per 4 cups of water-for a balanced concentrate that can be diluted later. |
| Steeping Time | Allow the mixture to steep at room temperature for 12 to 16 hours. Longer steeping increases strength but may introduce bitterness if overdone. |
Combining and Saturating the Grounds
Start by adding your coarse coffee grounds to a large container. Pour half the water over the grounds slowly, ensuring every particle gets wet. This initial wetting prevents dry clumps and promotes even extraction.
Stir the mixture gently with a spoon after adding the first half of the water. This agitation helps break up any floating clumps and ensures full saturation. The slurry should resemble a muddy riverbed, with no dry islands of coffee.
Once evenly wet, pour in the remaining water. Give the mixture one final stir to submerge any grounds clinging to the surface. At this stage, the coffee begins its slow, cold extraction, drawing out smooth, low-acid flavors over time.
Managing the Steeping Duration
Time plays a defining role in your cold brew’s final character. A steep under 12 hours may yield a weak, underdeveloped concentrate, lacking depth and body.
Leaving the brew too long-beyond 18 hours-can extract unwanted bitter compounds, especially if your grind is slightly too fine. Aim for 12 to 16 hours at room temperature for optimal balance.
Temperature affects extraction speed. If brewing in a warm kitchen, consider shortening the steep by a couple of hours. Cooler environments may require the full 16 hours for full flavor development.
Consistency matters most. Once you find a steeping window that suits your taste, stick with it. Small changes in time can shift flavor dramatically, so treat each batch as a chance to refine your personal standard. Store your brew in the refrigerator after straining to halt extraction and preserve freshness for up to two weeks.
Expert Tips for Flavor Refinement
Water quality shapes the final taste of your cold brew more than most realize. Using filtered water removes chlorine and minerals that can distort flavor, letting the coffee’s natural notes shine. The grind size also plays a decisive role-too fine and the brew turns muddy; too coarse and it lacks depth. A consistent medium-coarse grind ensures balanced extraction over the long steep.
- Use a 1:8 coffee-to-water ratio for a concentrated base that can be diluted to taste
- Steep for 12-16 hours at room temperature for optimal clarity and smoothness
- Store your concentrate in a sealed glass jar in the fridge for up to two weeks
Recognizing subtle shifts in aroma and mouthfeel helps you adjust future batches with confidence.
Optimizing the Extraction Environment
Temperature stability during steeping prevents uneven extraction and off-flavors. Room temperature, ideally between 68°F and 72°F, allows for a slow, steady draw of soluble compounds without encouraging fermentation. Avoid placing your brewing vessel near heat sources or in direct sunlight, as fluctuations can accelerate extraction unpredictably. A consistent environment supports cleaner, more predictable results.
Container material influences both flavor and oxidation. Glass or food-grade plastic won’t impart unwanted tastes, unlike some metals or low-quality plastics. Make sure the vessel is airtight to limit oxygen exposure, which can dull flavors over time. Light also degrades coffee compounds, so using an opaque or covered container helps preserve freshness throughout the steep.
Agitation during steeping isn’t necessary, but a gentle stir at the beginning ensures all grounds are saturated. This simple step prevents dry pockets that lead to under-extraction. Keeping conditions stable from start to finish gives you greater control over the final cup.
Techniques for Reducing Acidity
Cold brew is naturally lower in acidity than hot coffee, but small adjustments can make it even smoother. Choosing a dark or medium roast reduces inherent acid levels, as longer roasting breaks down acidic compounds. Beans from regions like Sumatra or Brazil often have earthy, low-acid profiles that complement cold brewing well.
Extending the steep time beyond 16 hours can also mellow sharpness, allowing more balanced compounds to emerge. However, monitor closely-over-steeping can introduce bitterness. Using slightly cooler water during mixing, just below room temperature, slows acid extraction while preserving body.
Adjusting your dilution ratio with milk, cream, or even a pinch of salt can round out any lingering brightness. These small tweaks tailor the experience to your palate without masking the coffee’s character.
Reducing acidity isn’t about eliminating flavor-it’s about refining it to suit your taste. Some acidity adds complexity, but if your stomach reacts to brighter notes or you simply prefer a rounder cup, these methods offer practical control. Experiment with bean origin, roast level, and steep duration to find your ideal balance. The beauty of cold brew lies in its adaptability, letting you fine-tune every variable for a consistently satisfying result.
Storing and Serving Your Cold Brew
Once your cold brew concentrate has finished steeping and you’ve strained it thoroughly, proper storage ensures it stays fresh and flavorful. Transfer the liquid into a clean, airtight glass container or bottle to minimize exposure to oxygen and light, both of which can degrade quality over time. A mason jar with a tight seal or a dedicated beverage dispenser works perfectly for this purpose.
Keep your cold brew in the main compartment of your refrigerator, not in the door, where temperatures fluctuate more with frequent opening. This consistent, cold environment slows bacterial growth and preserves the smooth, rich taste you worked hard to extract. Stored correctly, your concentrate can maintain peak quality for up to two weeks.
When you’re ready to enjoy a serving, pour the desired amount over ice and add water or milk to suit your taste. The beauty of cold brew lies in its versatility-serve it straight, sweeten it lightly, or mix it into creamy iced lattes. How you serve it is entirely up to your morning ritual or afternoon pick-me-up.
Proper Refrigeration for Longevity
Your refrigerator is the best place to preserve the integrity of homemade cold brew. Cold temperatures prevent spoilage and maintain the coffee’s clean, low-acid profile. Always use a clean container with a secure lid to avoid absorbing odors from other foods.
Store the concentrate toward the back of the fridge, where temperatures remain most stable. Avoid placing it in the door, as frequent opening introduces warmth and light, accelerating degradation. Consistent cold slows oxidation, helping your brew taste fresh for days.
Check your batch periodically for any off smells or cloudiness, signs it may have gone bad. While two weeks is a safe window, flavor begins to fade after ten days. For best results, label your container with the brew date so you know when it’s time to start a new batch.
Dilution Methods for Concentration
The concentrate you’ve made is meant to be diluted before drinking, unless you prefer an intense coffee punch. A standard starting ratio is one part cold brew to one part water, but personal taste varies widely. Some enjoy it stronger, others milder, so adjust gradually.
Use filtered water to maintain a clean flavor profile, especially if your tap water has a strong mineral taste. Pour the concentrate over ice first, then add water to control dilution as the ice melts. This method prevents over-thinning while keeping your drink refreshingly cold.
You can also experiment with milk, oat milk, or sweetened creamers to create café-style beverages at home. Cold brew’s smooth base pairs well with a range of additions, making each serving customizable. Try different ratios until you find your perfect balance.
Dilution isn’t just about strength-it’s about crafting a drink that fits your mood and moment. Whether you want a bold wake-up call or a mellow afternoon sip, adjusting the water or milk ratio gives you full control. This flexibility is one of cold brew’s greatest strengths, turning a simple concentrate into endless possibilities with just a few tweaks.
To wrap up
Hence, making cold brew coffee at home is a simple process that rewards patience with smooth, rich flavor. You only need coarsely ground coffee, cold water, and a vessel for steeping-typically a jar or a dedicated cold brew maker. Steep the grounds in water for 12 to 16 hours at room temperature or in the refrigerator, then strain using a fine-mesh sieve or a coffee filter for clarity.
Your personal taste guides the strength and concentration. Dilute the concentrate with water or milk to your liking, or serve it over ice for a refreshing drink. Cold brew’s low acidity makes it easier on the stomach than hot-brewed coffee, appealing to many palates.
With minimal equipment and effort, you gain control over every aspect of flavor. Once you master the basics, experimenting with bean origin or steeping time becomes second nature. This method fits seamlessly into daily routines, offering a reliable, customizable coffee experience right from your kitchen.